
I occasionally need to set up a new Raspberry Pi and always find myself looking up the same dd command parameters. With recent changes to Raspberry Pi OS-such as the removal of the default pi user and the way SSH is enabled-I decided to write down the complete process.
Note: For most users, the official Raspberry Pi Imager is the recommended tool.
Requirements#
- Ensure that
xzis installed:brew install xz
- Download the desired version of Raspberry Pi OS.
In this example, we use the 64-bit Lite version:
2022-04-04-raspios-bullseye-arm64-lite.img.xz
Step 1: Decompress the Image#
Navigate to the download directory and decompress the image:
cd Downloads
xz -d 2022-04-04-raspios-bullseye-arm64-lite.img.xz
Step 2: Identify the SD Card#
Run
diskutil listbefore inserting the SD card to note existing devices.Insert the SD card and run the command again:
diskutil list
Identify the new device. It will typically be marked as external and have a size matching your SD card. For example:
/dev/disk4 (external, physical):
   #:                       TYPE NAME                    SIZE       IDENTIFIER
   0:     FDisk_partition_scheme                        *64.0 GB    disk4
   1:             Windows_FAT_32 boot                    268.4 MB   disk4s1
   2:                      Linux                         63.7 GB    disk4s2
Step 3: Flash the Image#
Unmount the SD card:
diskutil unmountDisk /dev/disk4Write the image using dd. Use /dev/rdisk instead of /dev/disk for better performance, and include status=progress to monitor progress:
sudo dd bs=1m if=2022-04-04-raspios-bullseye-arm64-lite.img of=/dev/rdisk4 status=progressOnce complete, eject the card:
diskutil eject /dev/disk4At this point, Raspberry Pi OS is installed. If you’re using a monitor and keyboard for setup, insert the SD card into the Pi and power it on. To configure the Pi headlessly (via SSH), continue with the steps below.
Step 4: Enable SSH and Create a User#
Mount the SD card again if needed (or simply re-insert the SD card). The boot partition should appear at /Volumes/boot.
Enable SSH#
Create an empty ssh file in the boot partition to enable SSH on first boot:
touch /Volumes/boot/sshCreate a User#
Since Raspberry Pi OS no longer provides a default username and password, you must define your own.
Ensure OpenSSL is installed:
brew install opensslSet your desired username and password:
USERNAME=myusername
PASSWORD=mypassword
HASHED_PASSWORD=$(echo "${PASSWORD}" | $(brew --prefix openssl@1.1)/bin/openssl passwd -6 -stdin)
echo "${USERNAME}:${HASHED_PASSWORD}" > /Volumes/boot/userconf
This will create a userconf file containing one line like:
myusername:$6$random_salt_and_hashEject the disk:
diskutil eject /dev/disk4Insert the SD card into the Raspberry Pi and power it on.
After a minute or two, the Pi should be available on your network. You can connect via SSH:
ssh myusername@raspberrypi.localStep 5: Configure the Raspberry Pi#
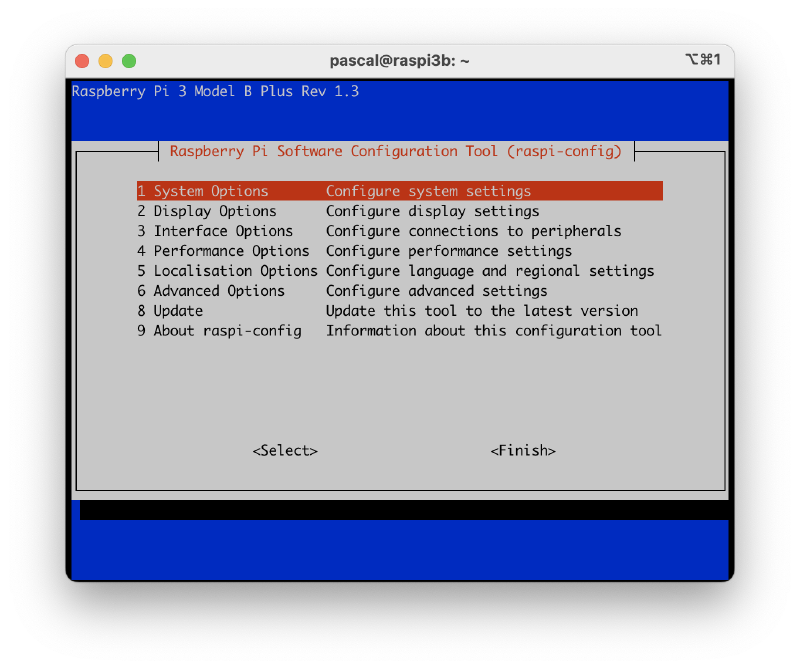
Run raspi-config#
Use the built-in configuration tool to set the hostname, enable Wi-Fi, update the system, and expand the filesystem:
sudo raspi-configYou should see a text-based interface with various setup options.
Optional: Update the System and Install Packages#
To update the system and install common tools:
sudo apt update
sudo apt upgrade -y
sudo apt install -y vim git
Optional: Configure Locales#
You can configure locales either through raspi-config or manually.
To do it manually:
Edit
/etc/locale.genand uncomment the desired locales.Generate the locales:
sudo locale-gen
Alternatively:
sudo dpkg-reconfigure locales